¶ Chart of Account (CoA)
Chart of account gives Complete overview of your Company’s Ledgers. In the Chart of Accounts you can browse all the ledgers under the proper headings. You can also view the Chart of Accounts in a tree Format in which the left hand side will display the name of the ledger and the right hand side will display the balance of the Account along with the Debit and Credit indication.
¶ Navigate to Chart of Accounts
¶ STEP I
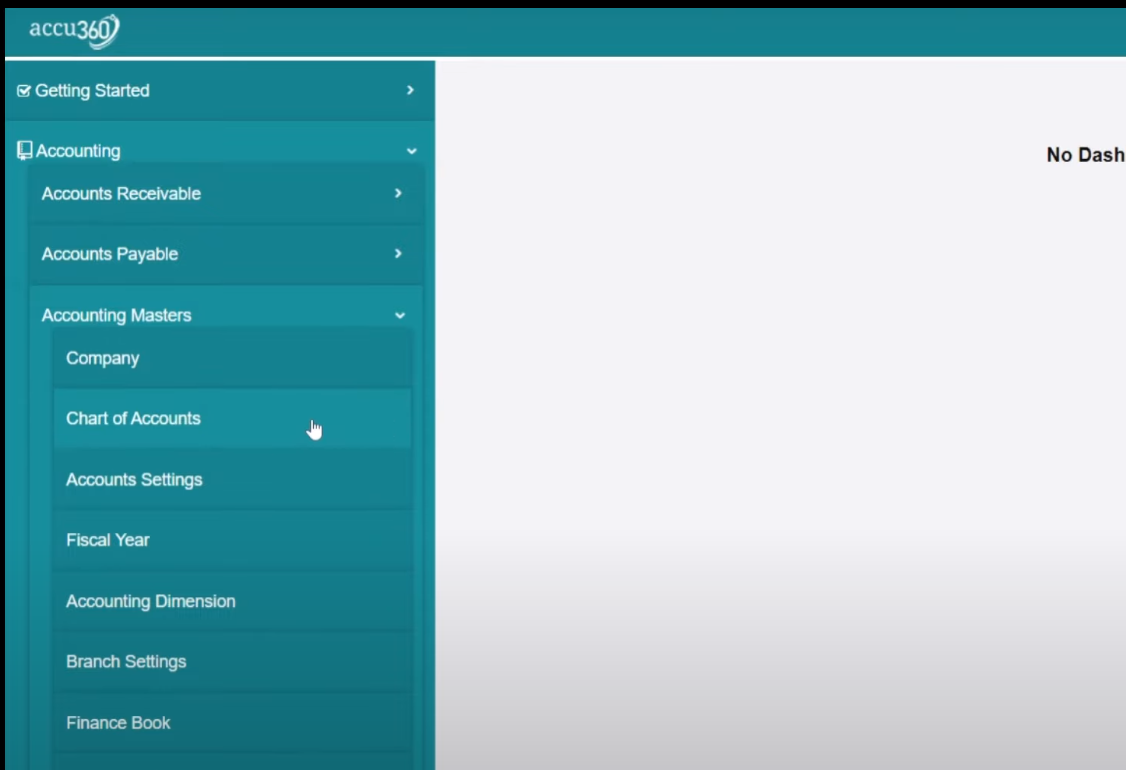
Home > Accounting Module > Accounting Masters > Chart of Accounts
Select Accounting Module then Click on Accounting Masters then Select Chart of Accounts

to view the Chart of Accounts in tree format, open any account and click on “Chart of Account”

.png)
¶ Step II
In the account chart window, there are four main headings displayed by default.

To view all the ledgers in a tree view, you need to click on the “Expand” button. The “Expand All” button can be found in the top right corner for convenience.

¶ Parent & Child ledgers creation
-
¶ Creating a Child Ledger
To add a new Child under a Parent, click on the Parent and then Click “Add Child” Button

A Dialogue Box will appear, Name the new account, and click “Create New.”

-
¶ Creating a Parent Group
To add a new Parent Group, click on the Parent under which another Parent neeeds to be enter and then Click “Add Child” Button

A Dialogue Box will appear, Name the new account, and click ‘Is Group’, finally click on “Create New.”

¶ Delete a ledger
To delete an account, select it and click “Delete,” then confirm.


Note: A ledger needs to be Empty i.e. should not have any transactions to delete it.
¶ Conversion of Non - Group to Group of a Ledger Or Vice - versa
-
¶ Step I
Click the ledger and then Click Edit Option.

-
¶ Step II
Click On “Non Group to Group” Button

Click on the “RIGHT TICK” to save
¶ Other Necessary Information
- “Chart of Accounts” Button is used to navigate to tree view of Chart of Accounts
- Use “Merge” Button to Combine two ledgers to one
- Select “YES” Option in “FROZEN” if you wish to freeze an Account such that no one is able to use that Account
- “Balance Must be” Option gives you power to Fix any of the Debit or Credit in an Account.
- Use “Ledger” Button or “View Ledger” Button to View the ledger of a particular account
- Set Accounts Type as it helps in selecting the Accoount in the transactions.
¶ Fiscal Year
Accounting > Accounting Master > Fiscal Year
To create a new fiscal year you can click on the “new” button on the right top corner. Then provide the required details and then save it. You can also disable any fiscal year at any time. To make any fiscal year as a default fiscal year you have to click the SET AS DEFAULT button from right top corner.
New fiscal year will be created automatically on the very first day of the new fiscal year.
Note:- In Version 2.0.1 you cannot disable current fiscal year
¶ Accounting Dimension
Accounting > Accounting Master > Accounting Dimension
If you have business with different product lines or multiple branches. You need separate Profit and Loss and Balance Sheets by branch wise or by product line then you should configure accounting-dimension. In simple words you can tag your transactions branch wise or by product line wise.
¶ Finance Book
Accounting > Accounting Master > Finance Book
“Finance book” is a very useful feature. It helps you to maintain multiple books of account at same time. You can have more than one financial book for your internal and external use.
Finance Book is not mandatory configuration. Before configuration consult with your ACCU360 consultant or with your senior accountant.
¶ Accounting Period
Accounting > Accounting Master > Accounting Period
Accounting period is a locking period where you can define duration from date and end date to lock transactions for that period. You can also add transactional documents (Sales Invoice/Purchase Invoice/ Journal entries etc) which need to be restricted during that period.
At the same time all entries will be allowed outside of that period.
Note:- Accounting period is non submittable document which means you can easily edit accounting period document.
¶ Payment Term
You can create your pre-defined payment term for your customers and for suppliers. In payment terms you can define payment schedules and also payment amount or percentage.
You can create multiple payment terms as per your customers and suppliers.
For example if you have an invoice of Rs. 100000. By default payment terms will take 100% payment on the same day.
Payment Terms Configuration