¶ Purchase Invoice
A Purchase Invoice is a Document issued by the Supplier of Goods & Services to its Customer, having the details of that particular transaction with the Supplier. It also has a record of Goods & Services received. It plays a crucial role during the procurement process as it is an evidence of that purchase transaction as well as the accounting, finance and inventory management related to it.
In ACCU 360 ERP, creating purchase invoices efficiently and accurately is essential for streamlining the accounts payable process.
Prerequisites
¶ Relevance of Purchase Invoice
-
Documentation
Having a proper record of all the purchases through Purchase invoice serves a proper maintenance of documentation in an organization.
-
Real time Modification of Financial records
ACCU 360 ERP updates financial records of the organization as soon as they are saved i.e. in real-time the financial will reflect the changes due to creation of Purchase invoice.This includes Inventory, accounts, expenses, accounts payable etc.
-
Visibility into Procurement Process
Creating a purchase invoice in ACCU 360 ERP provides visibility into the entire procurement process. Stakeholders can track the progress of the purchase from requisition to invoice creation, aiding in transparency and accountability.
-
Vendor Relationship Management: (VRM)
The creation of a purchase invoice also helps in managing relationships with vendors. Accurate and timely invoicing contributes to positive vendor relations and can be important for negotiating favorable terms in the future. -
Inventory Management:
If the purchase involves physical goods, the ACCU 360 ERP can update inventory levels, ensuring accurate stock information. This is crucial for maintaining optimal inventory levels and preventing stock outs or overstock situations
¶ Comprehensive Guide to Create a Purchase invoice
Access purchase invoice from Home > Accounting > Accounts Payable > Purchase Invoice
¶ STEP I
Go to the “ACCOUNTING” module then Click “ACCOUNTS PAYABLES” Then Click “PURCHASE INVOICE”

¶ Alternately
Use Shortcut “CTRL + G” or navigate to the search box. Type “PURCHASE INVOICE” and click on “PURCHASE INVOICE LIST” to open.

¶ STEP II
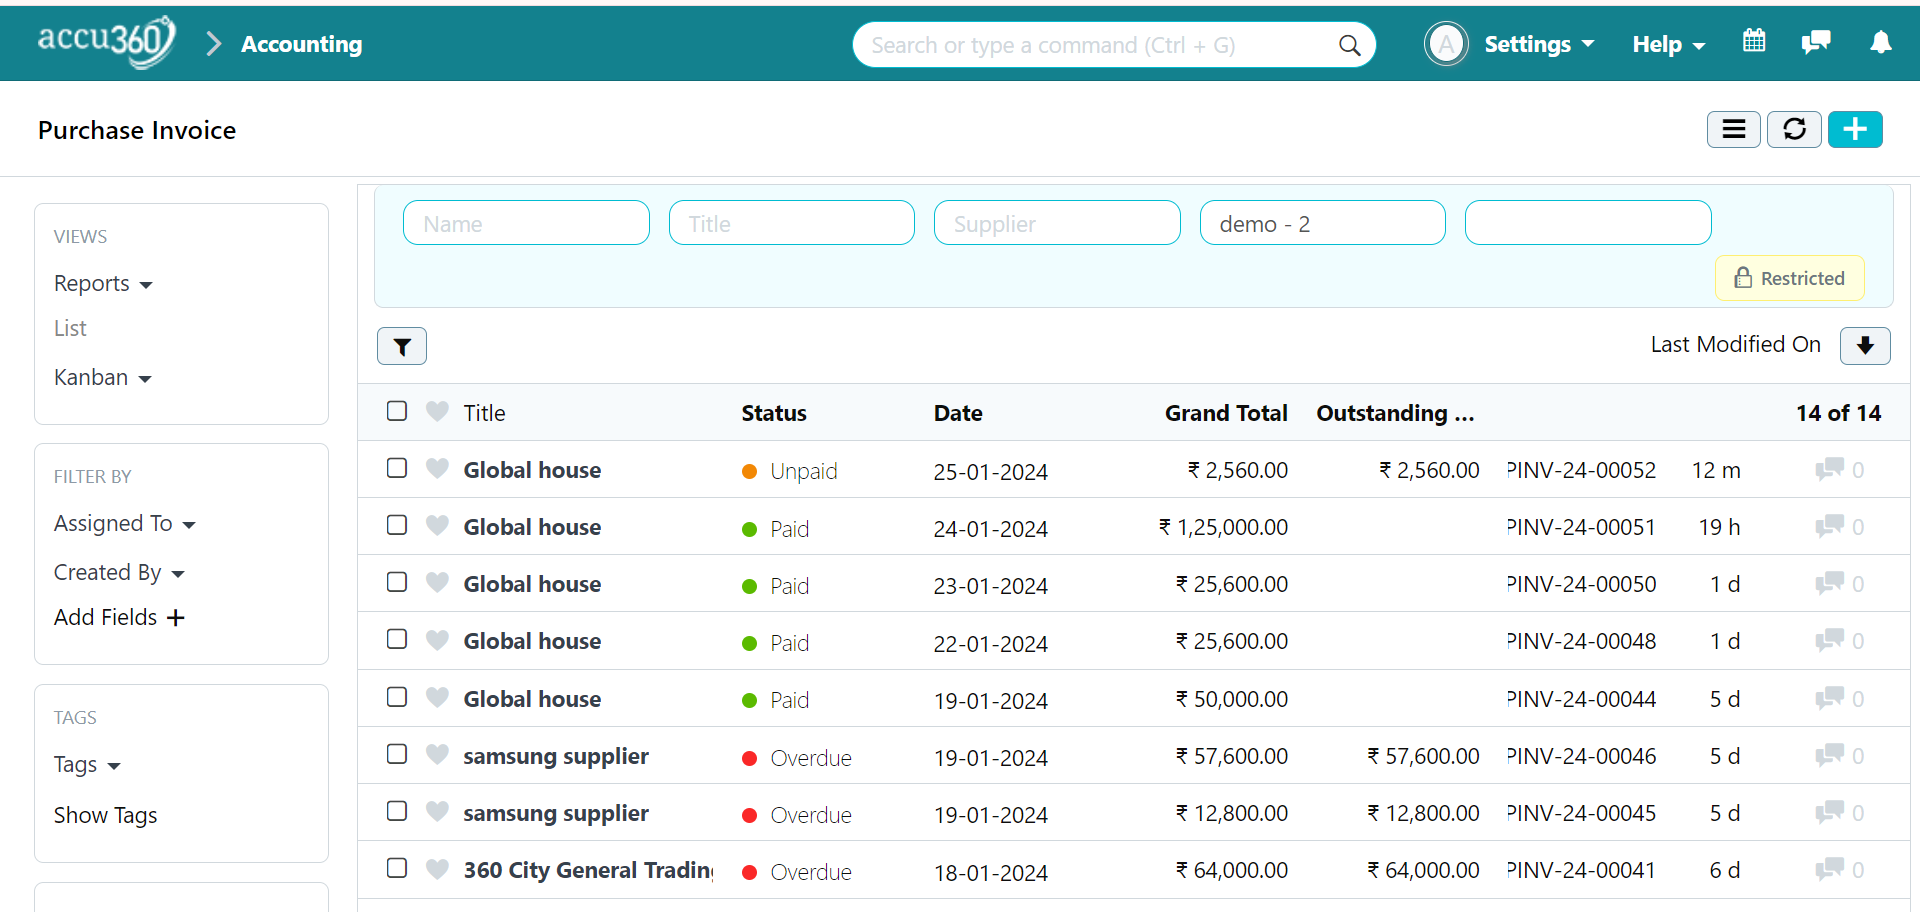
In the “PURCHASE INVOICE LIST” you may find a list of all the Purchase Invoices created by your Organization.
Search if you wish to edit an existing Purchase Invoice by “NAME” “TITLE” “SUPPLIER”
¶ STEP III
Click the “+” button in the corner to start creating a new Purchase Invoice.
¶ STEP IV
Add all the
Necessary Informationabout the Purchase.

¶ STEP V
Click the “TICK” icon to save all changes.

Note: the document is currently in draft mode.
To permanently submit and modify your books of accounts, click the “LOCK” button.

After clicking on “LOCK” button a prompt “SAVED” as well as “PURCHASE INVOICE HAS BEEN SUBMITTED SUCCESSFULLY” will appear
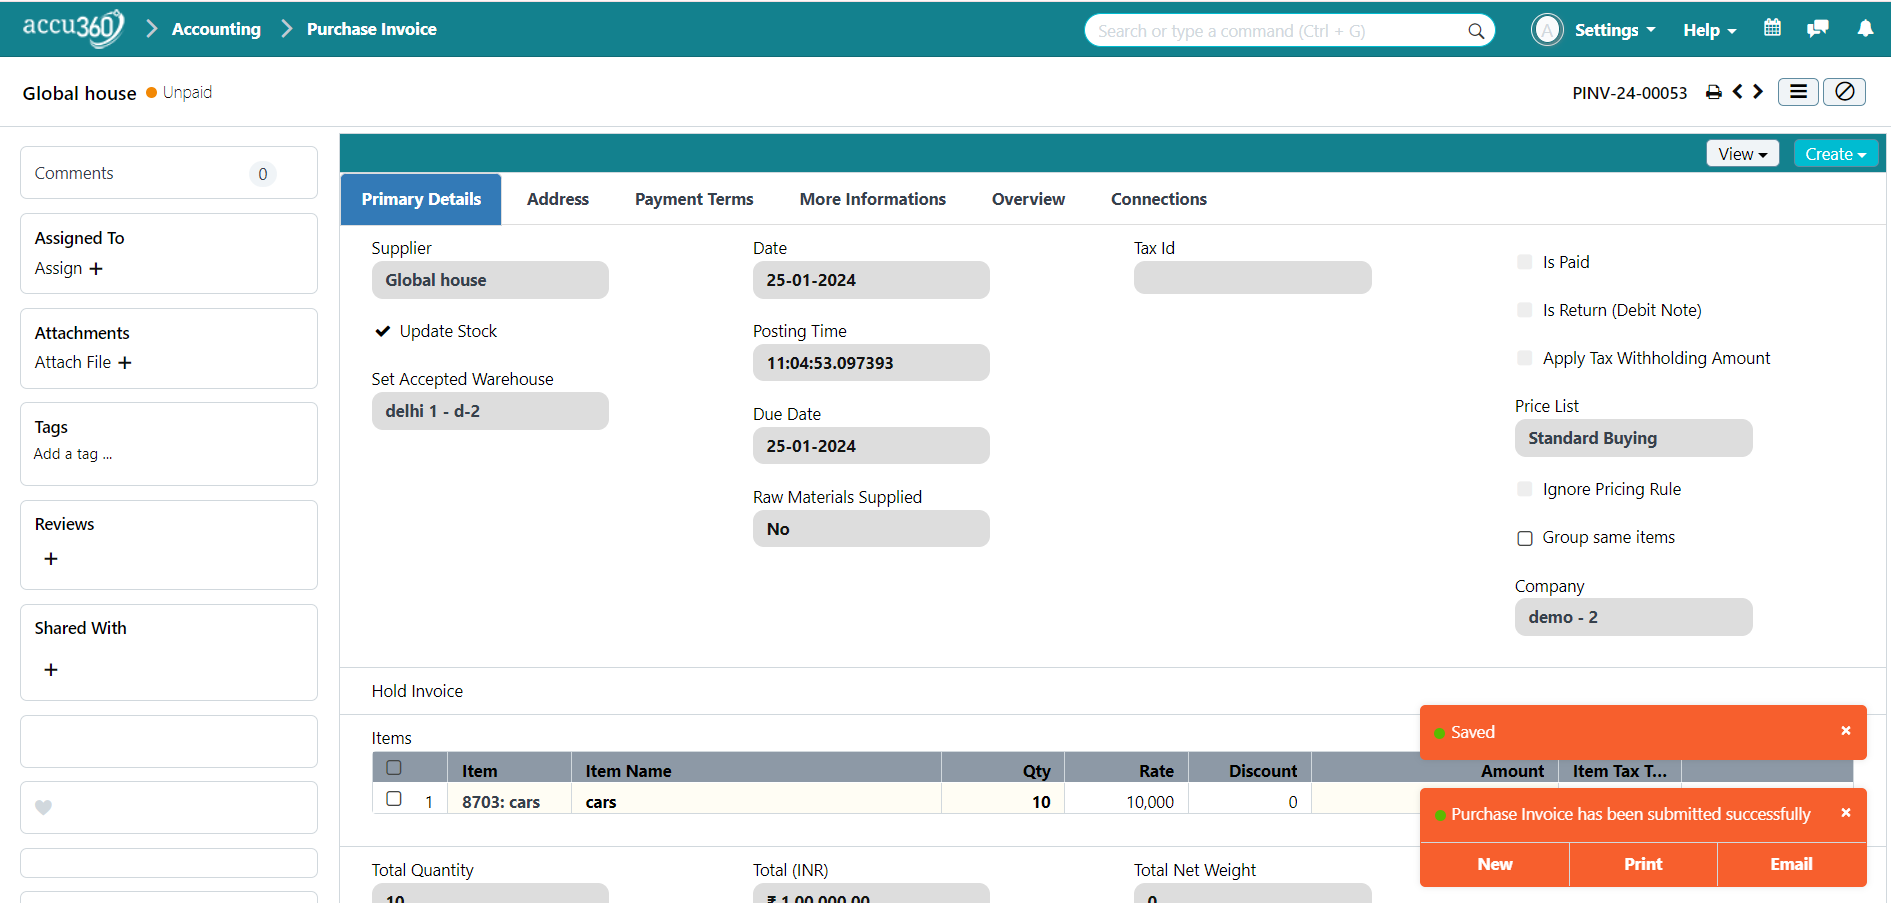
You can also click “EMAIL” to directly mail someone, “PRINT” to take a print Or jump to a “NEW” Purchase Invoice
¶ Existing Purchase Order / Purchase Receipt
ACCU 360 ERP is a powerful ERP software which equips seamless connections between various departments within the organization. So, if the Purchase Department has already generated a PURCHASE ORDER or already received the goods and generated a PURCHASE RECEIPT you don’t need to do this whole creation of the purchase invoice by adding each and every detail again.
Prerequisites
- Purchase Receipt
- Purchase Order
Access purchase invoice from Home > Accounting > Accounts Payable > Purchase Invoice
¶ STEP I
Click the “+” button in the corner to start creating a new Purchase Invoice.

¶ STEP II
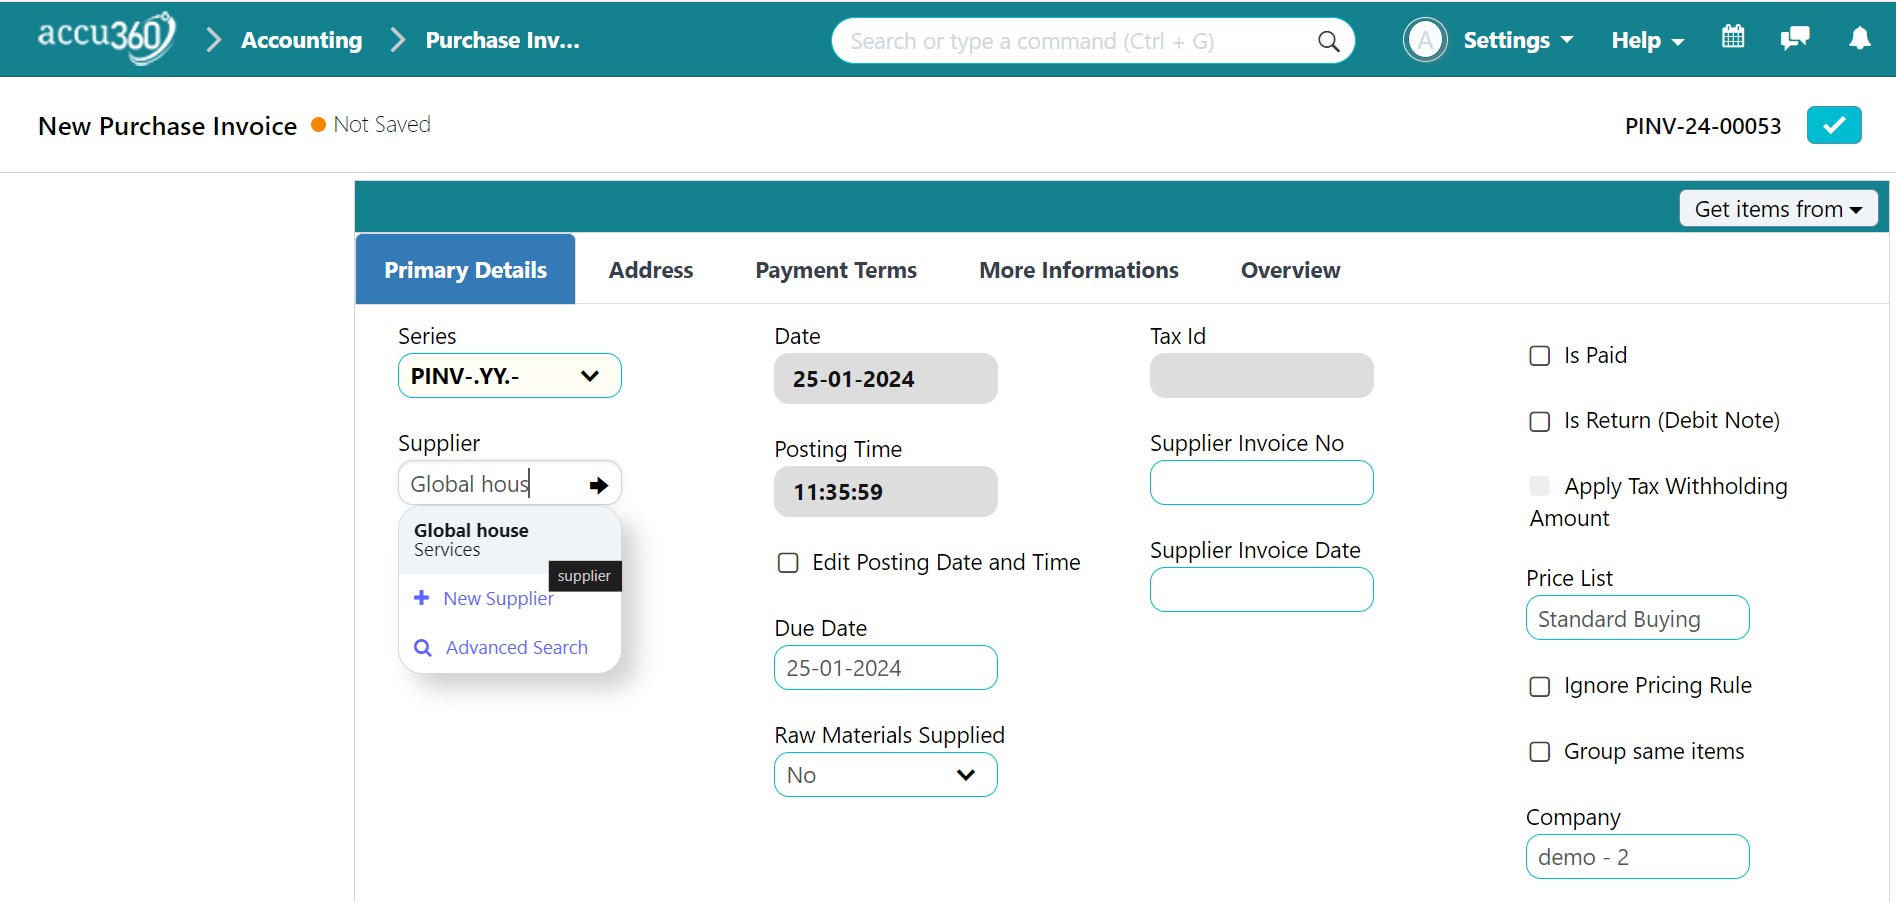
Choose the Supplier associated with the Purchase Order / Purchase Receipt for which you want to generate a Purchase Invoice.
¶ STEP III
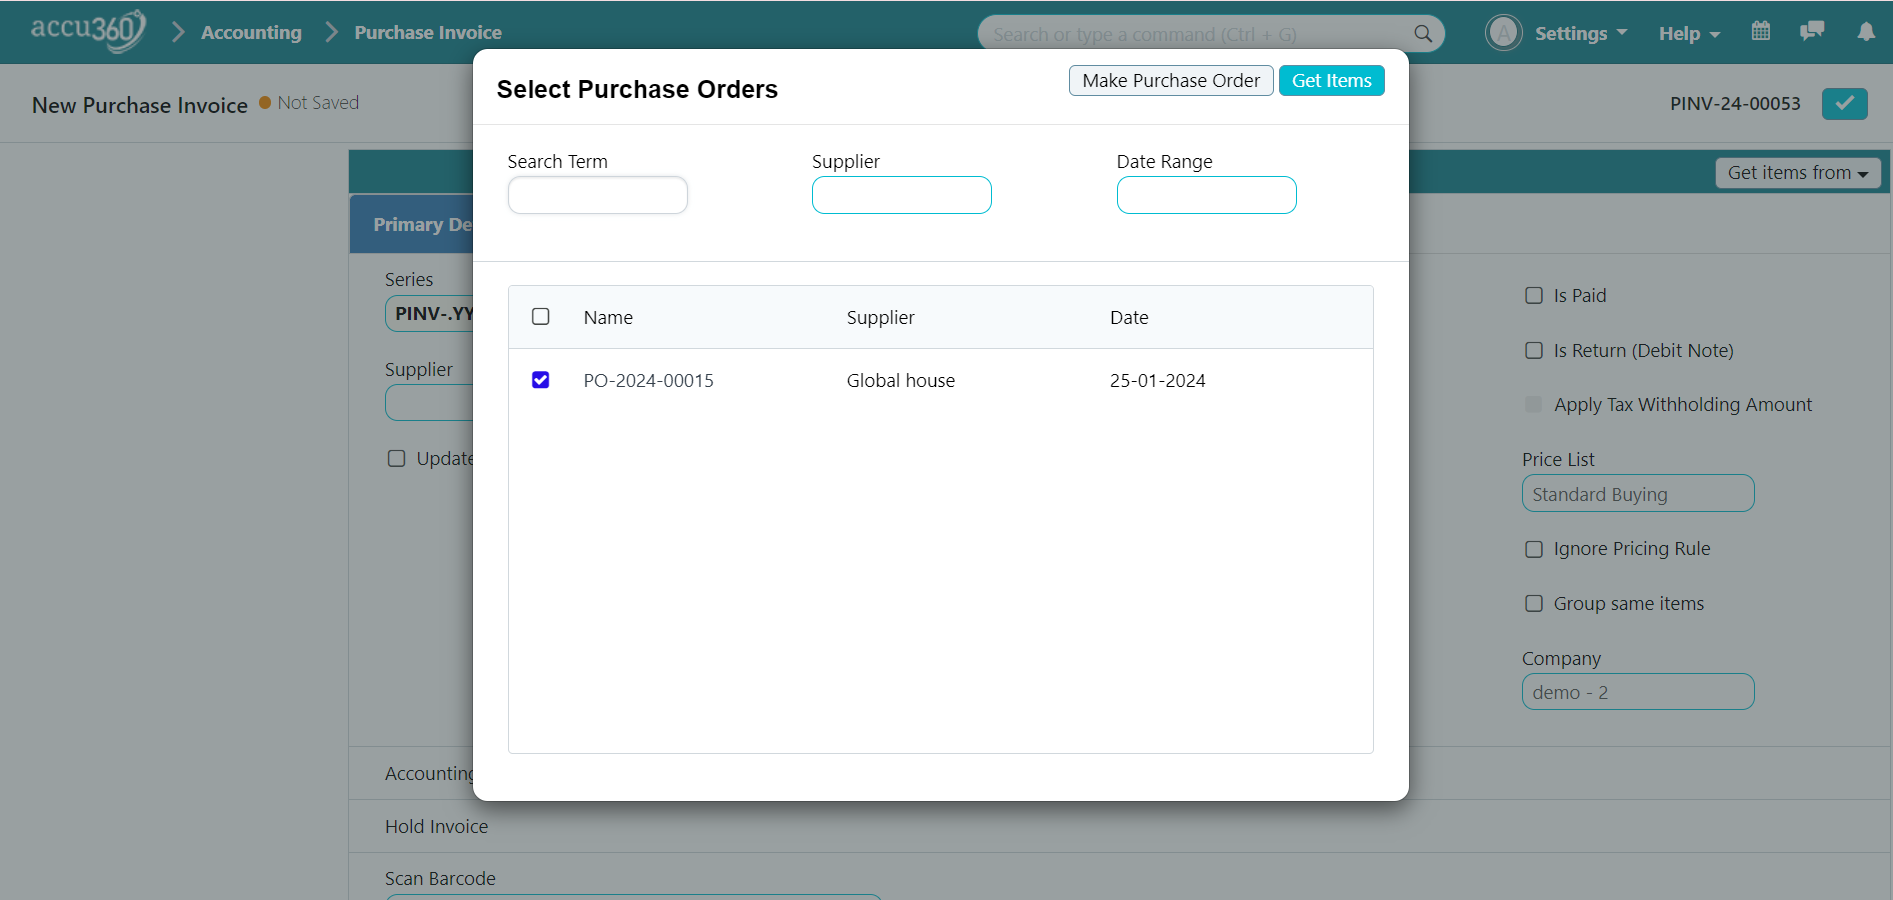
Click on “GET ITEMS FROM” select PURCHASE ORDER / PURCHASE RECEIPT to retrieve all the PURCHASE ORDER / PURCHASE RECEIPT associated with that Supplier. Select the PURCHASE ORDER / PURCHASE RECEIPT & click “GET ITMS”
¶ STEP IV
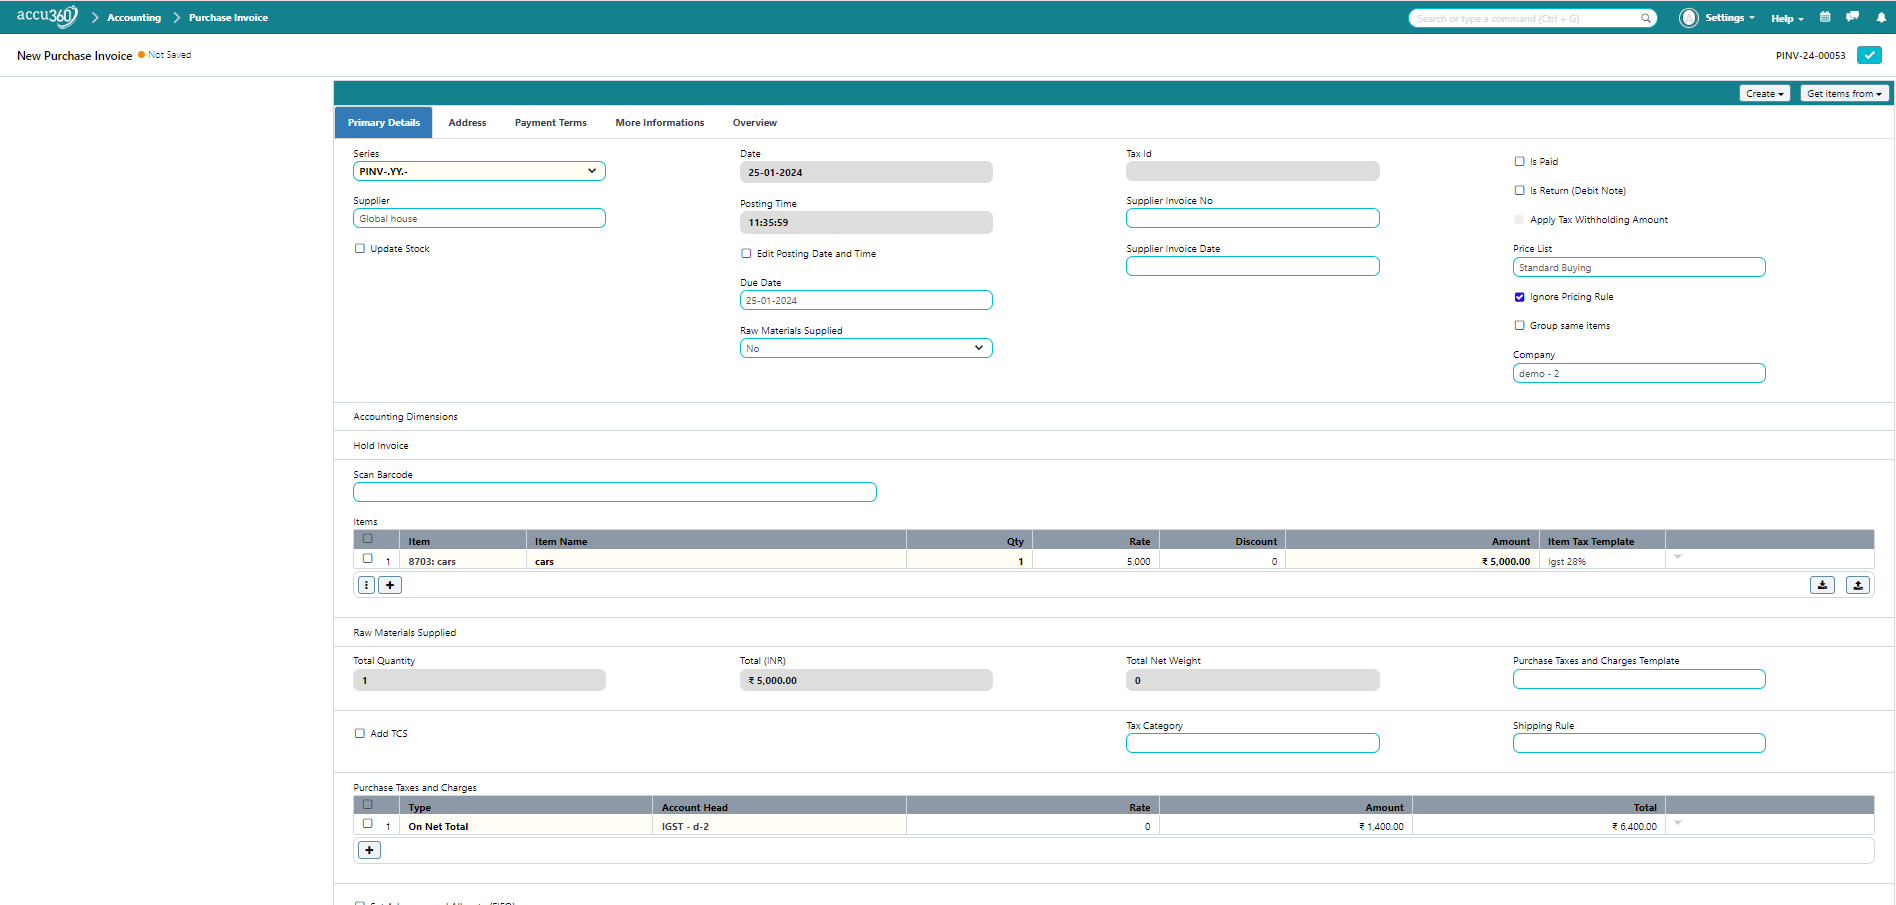
The system will auto - populate the Purchase Invoice with details from the selected Purchase order / Purchase Receipt. Check & confirm the pre-filled information to ensure accuracy.
¶ STEP V
Click the “TICK” icon to save all changes.
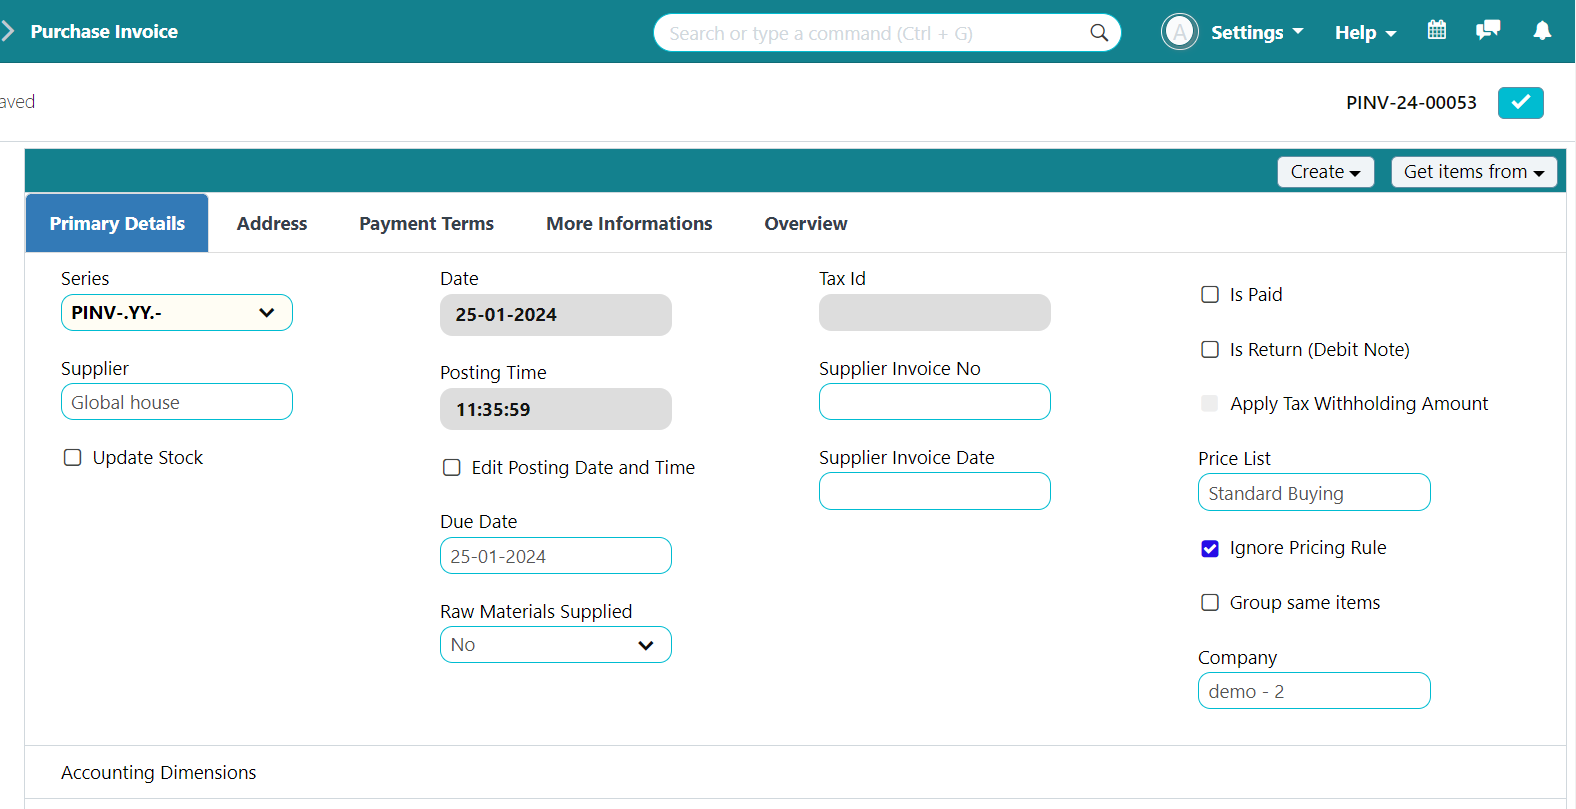
Note: the document is currently in draft mode.
To permanently submit and modify your books of accounts, click the “LOCK” button.
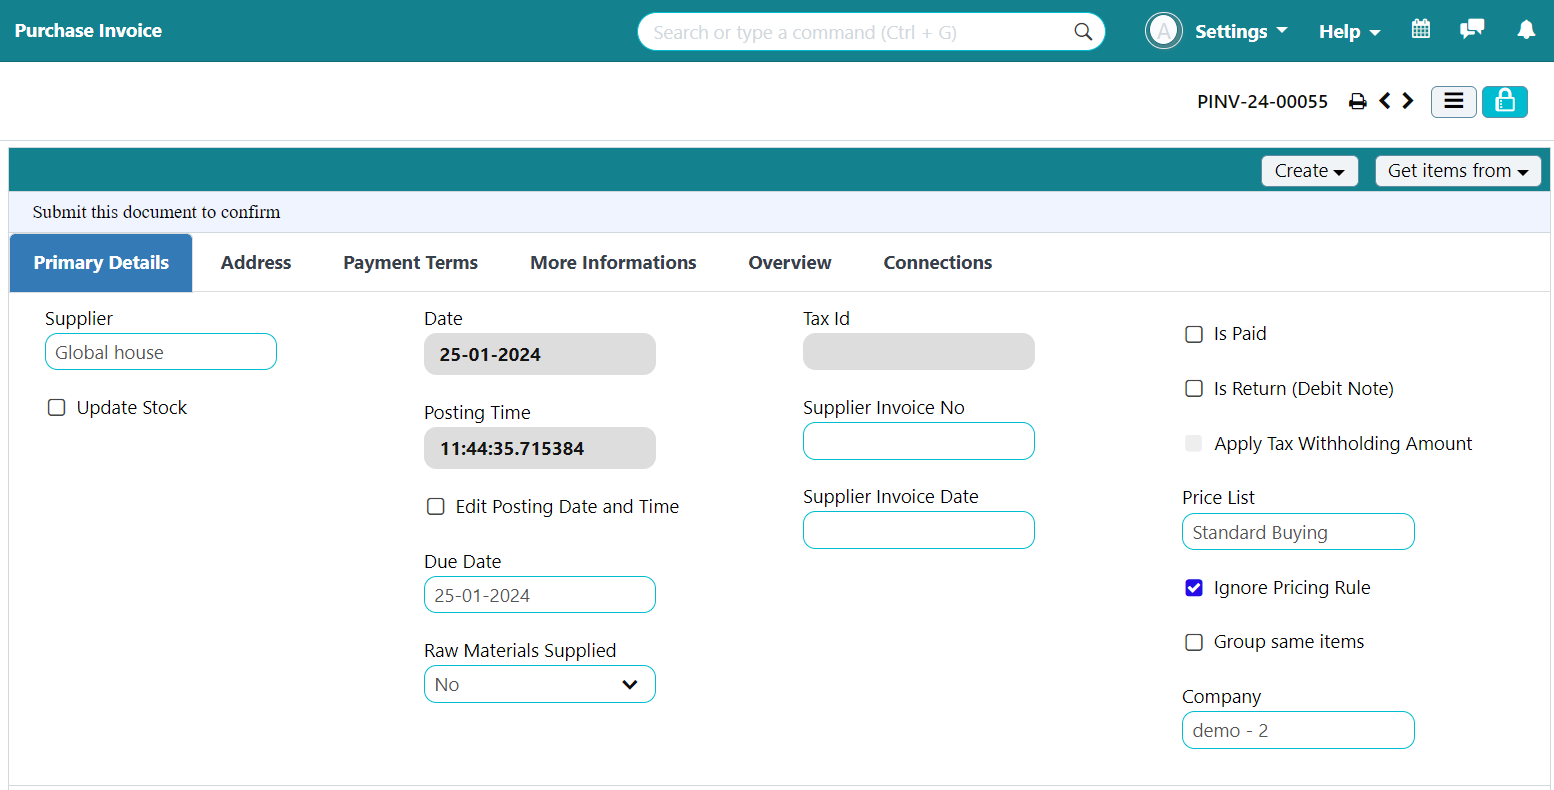
After clicking on “LOCK” button a prompt “SAVED” as well as “PURCHASE INVOICE HAS BEEN SUBMITTED SUCCESSFULLY” will appear
.png)
You can also click “EMAIL” to directly mail someone, “PRINT” to take a print Or jump to a “NEW” Purchase Invoice
¶ Other Necessary Information
-
ACCU 360 ERP will provide you with various pre-filled information according to your initial configurations and to make sure all the information is correct, always ensure to review all the pre - filled information. Please feel free to make necessary changes in case required or can seek advice from an ACCU 360 Consultant.
-
“ SUPPLIER “ As soon as you start typing the Name of the Supplier you can always see the available list of the Supplier , select the Supplier from there.
-
Select ”UPDATE STOCK” in case of Purchase Of Goods.
Note : If The Option is not selected the affecting ledgers would be creditors & Purchase similar to what in case of the Purchase of Services. to update the Stock, It is mandatory to select the given option. -
Select “ SET ACCEPTED WAREHOUSE ” where the goods are going to be stored.
Note : Once you have selected Update Stock it would be mandatory to give a warehouse where the goods are going to be stored. -
Tick the Box “ EDIT POSTING DATE AND TIME ” if you wish to change date or time according as it is Pre - filled with the date & time that are added by default when you started creating the Document.
-
Add “DUE DATE”. It is generally the date by which the goods should arrive at your warehouse or the provision of Service ought to Complete.
-
In case of Raw Material purchase select “YES” from “RAW MATERIAL SUPPLIED” & Provide the “SUPPLIER WAREHOUSE”. If it is not a Raw Material Purchase leave it as it is.
-
Include specific Supplier details like "TAX ID”, "Supplier’s Invoice No”, "Supplier’s Invoice Date”,** .
Note: TAX ID is not relevant for Indian users -
If the payment related to the invoice is already made check the box “IS PAID”
-
In case of returning a purchase check the box “IS RETURN”
-
If you deducted the TDS of the supplier then click the box “APPLY TAX WITHHOLDING AMOUNT” select the category of TDS Deducted from “TAX WITHHOLDING CATEGORY”.
-
If you have configured different price lists of various suppliers types, select the appropriate price list from the “PRICE LIST” box. If you don’t want to select any Price list check the box “Ignore Pricing Rule”
-
If you have Multiple branches open “Accounting Dimensions” select “ACCOUNT”, “BRANCH” “PROJECT” & “COST CENTER”
-
Hold invoice
-
In the " ITEM CODE " section, search for the item you need or use " + NEW ITEM " to add a new item.
-
The “ ITEM NAME ” will appear pre-filled along with the rate defined in the price list or you can add it manually. Add QUANTITY, RATE, & DISCOUNT, and the system will auto-calculate the total amount.
-
Select “ITEM TAX TEMPLATE” if you have been charged different tax on different item or select “PURCHASE TAX TEMPLATE” a single tax rate on all items have been charged, the tax will auto populate.
-
If you have collected the TCS from the supplier check the box “ADD TCS” In “TCS RATE” table add the Percentage Collected
-
If Multiple advance has been Paid to the Suppliers check the option ”Set Advances and allocate FIFO” to allocate the First advance First with the invoice basis.
-
If advances already paid to the Supplier & you want to manually allocate such advances click “GET ADVANCES PAID” button, the system will automatically Retrieve the advances already paid to that Supplier, Check & Confirm Pre filled data to ensure accuracy.
-
Provide additional information such as the address of your company and the recipient in the " ADDRESS " section, Define Payment Terms in ”Payment section”, and any other relevant information in the “MORE INFORMATION” section.
¶ Delete or Modify an Existing Purchase Invoice
Access purchase invoice from Home > Accounting > Accounts Payable > Purchase Invoice
¶ STEP I
In the “PURCHASE INVOICE LIST” you may find a list of all the Purchase Invoices created by your Organization.
Search an existing Purchase Invoice by “NAME” “TITLE” “SUPPLIER”
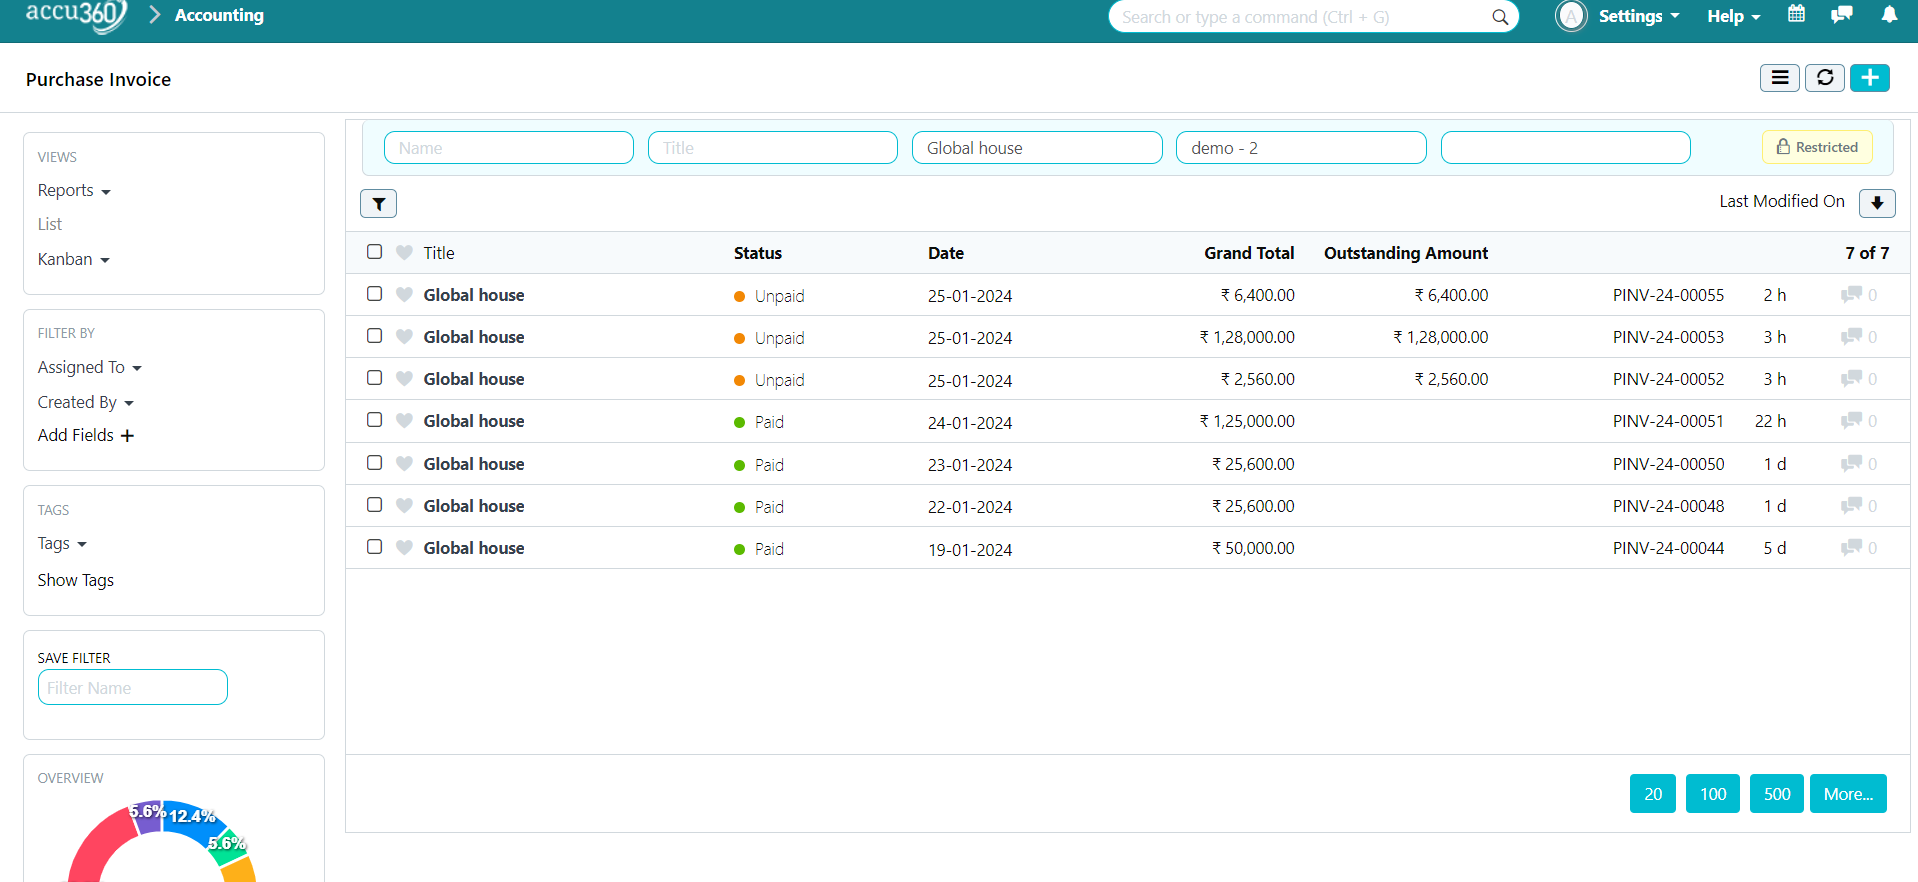
Open the invoice by clicking on the name of the Supplier
¶ STEP II
Click On “Cancel Button” in Right Corner to Permanently cancel the Invoice first,

A Confirmation prompt will appear Click YES
¶ STEP III
Click on EDIT Button in the corner to Edit the Document
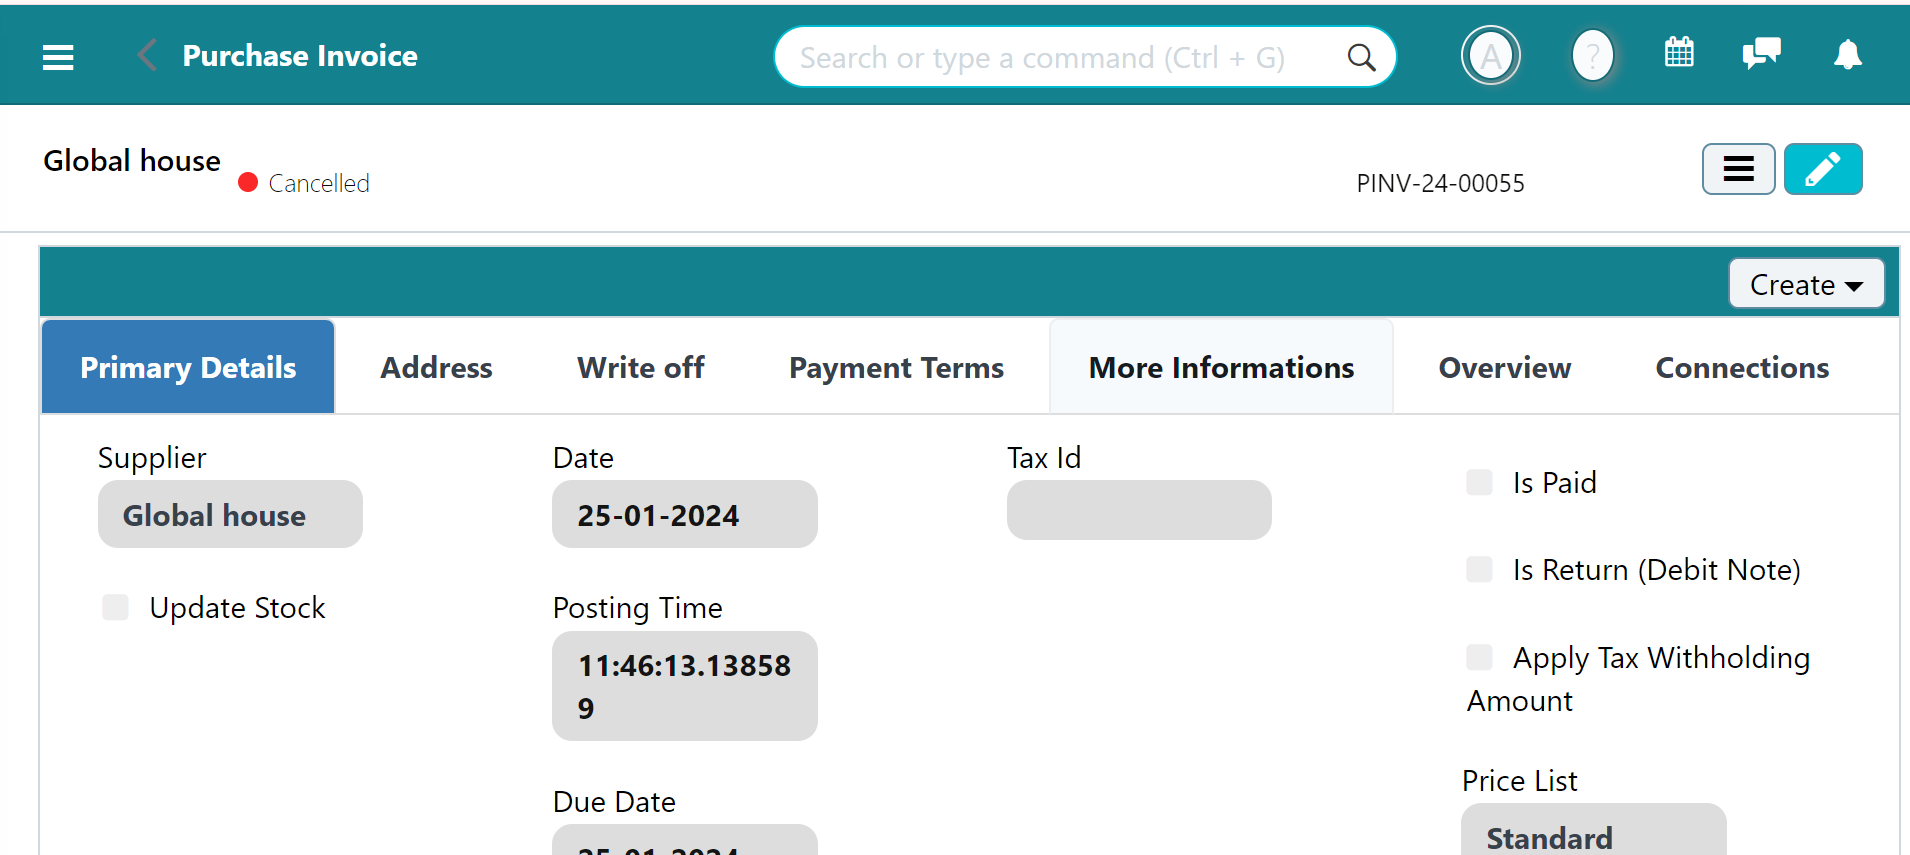
Make the Necessary changes & Save the invoice again according to the above mentioned procedure
¶ To Permanently Delete
Go to the Menu option Given to the left of EDIT Button. Select Delete & Click on “Yes” to Confirmation Prompt
Alternatively use CTRL + SHIFT + D
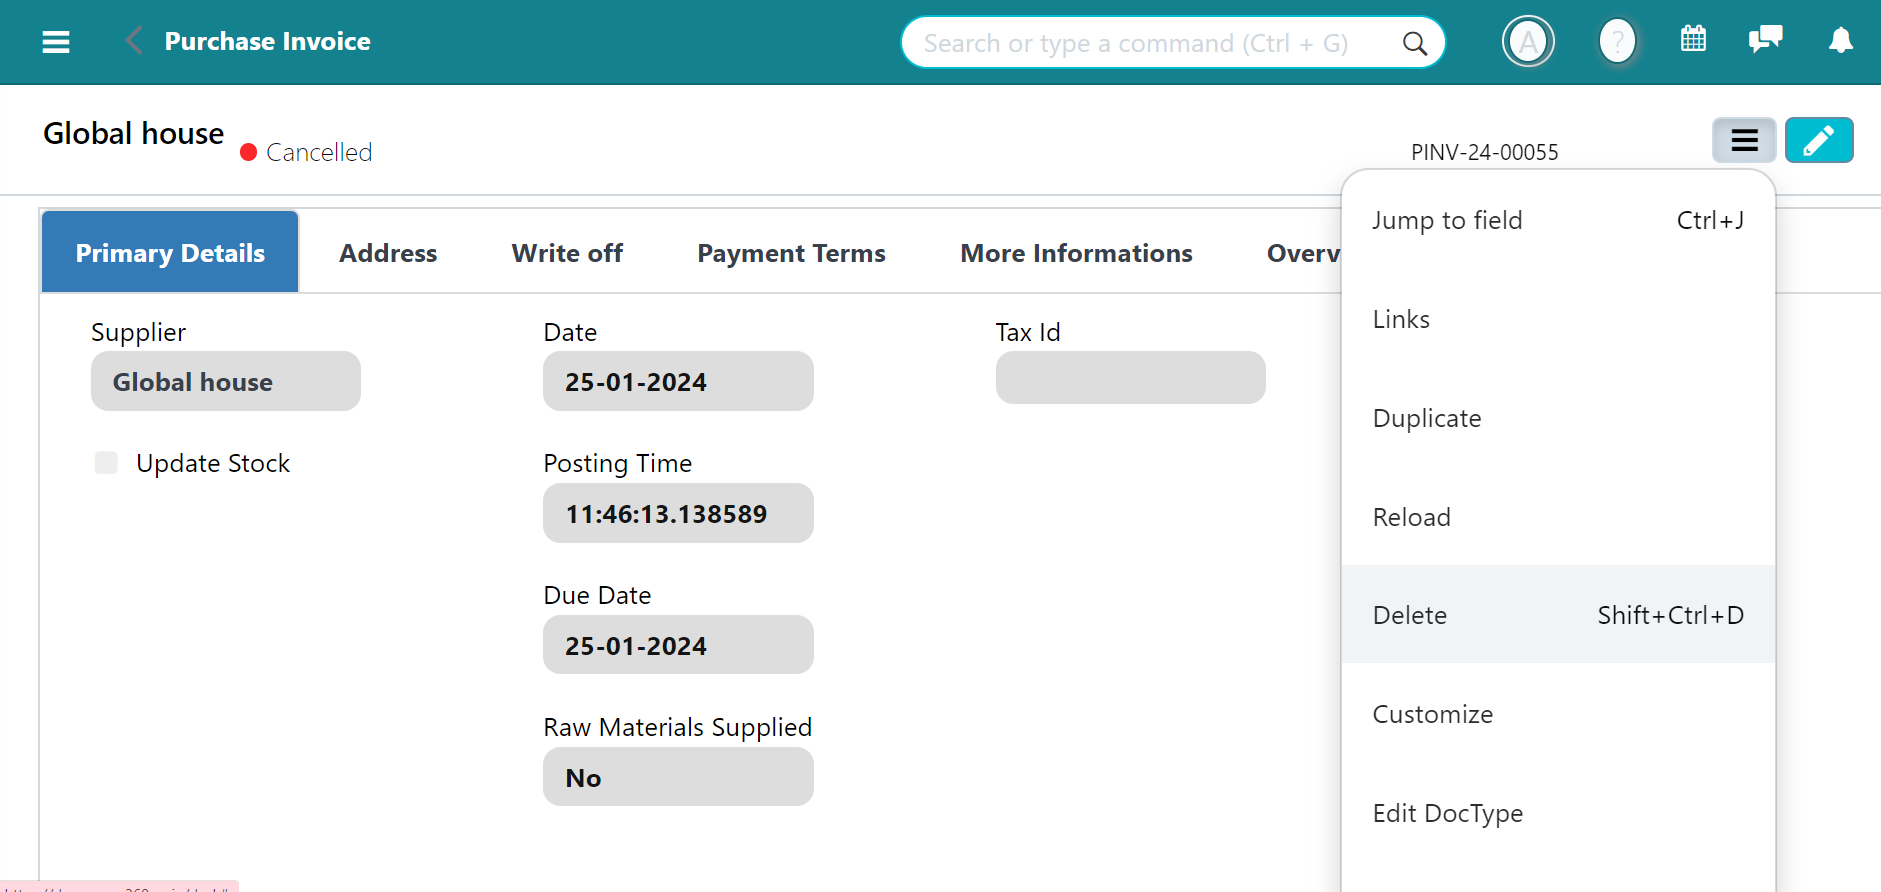
Your Invoice is Permanently Deleted
¶ Connections
¶ Want to check How many Documents are connected to Your generated Purchase Invoice ?
Access purchase invoice from Home > Accounting > Accounts Payable > Purchase Invoice
¶ STEP I
In the “PURCHASE INVOICE LIST” you may find a list of all the Purchase Invoices created by your Organization.
Search an existing Purchase Invoice by “NAME” “TITLE” “SUPPLIER”

Open the invoice by clicking on the name of the Supplier
¶ STEP II
Navigate to Connections
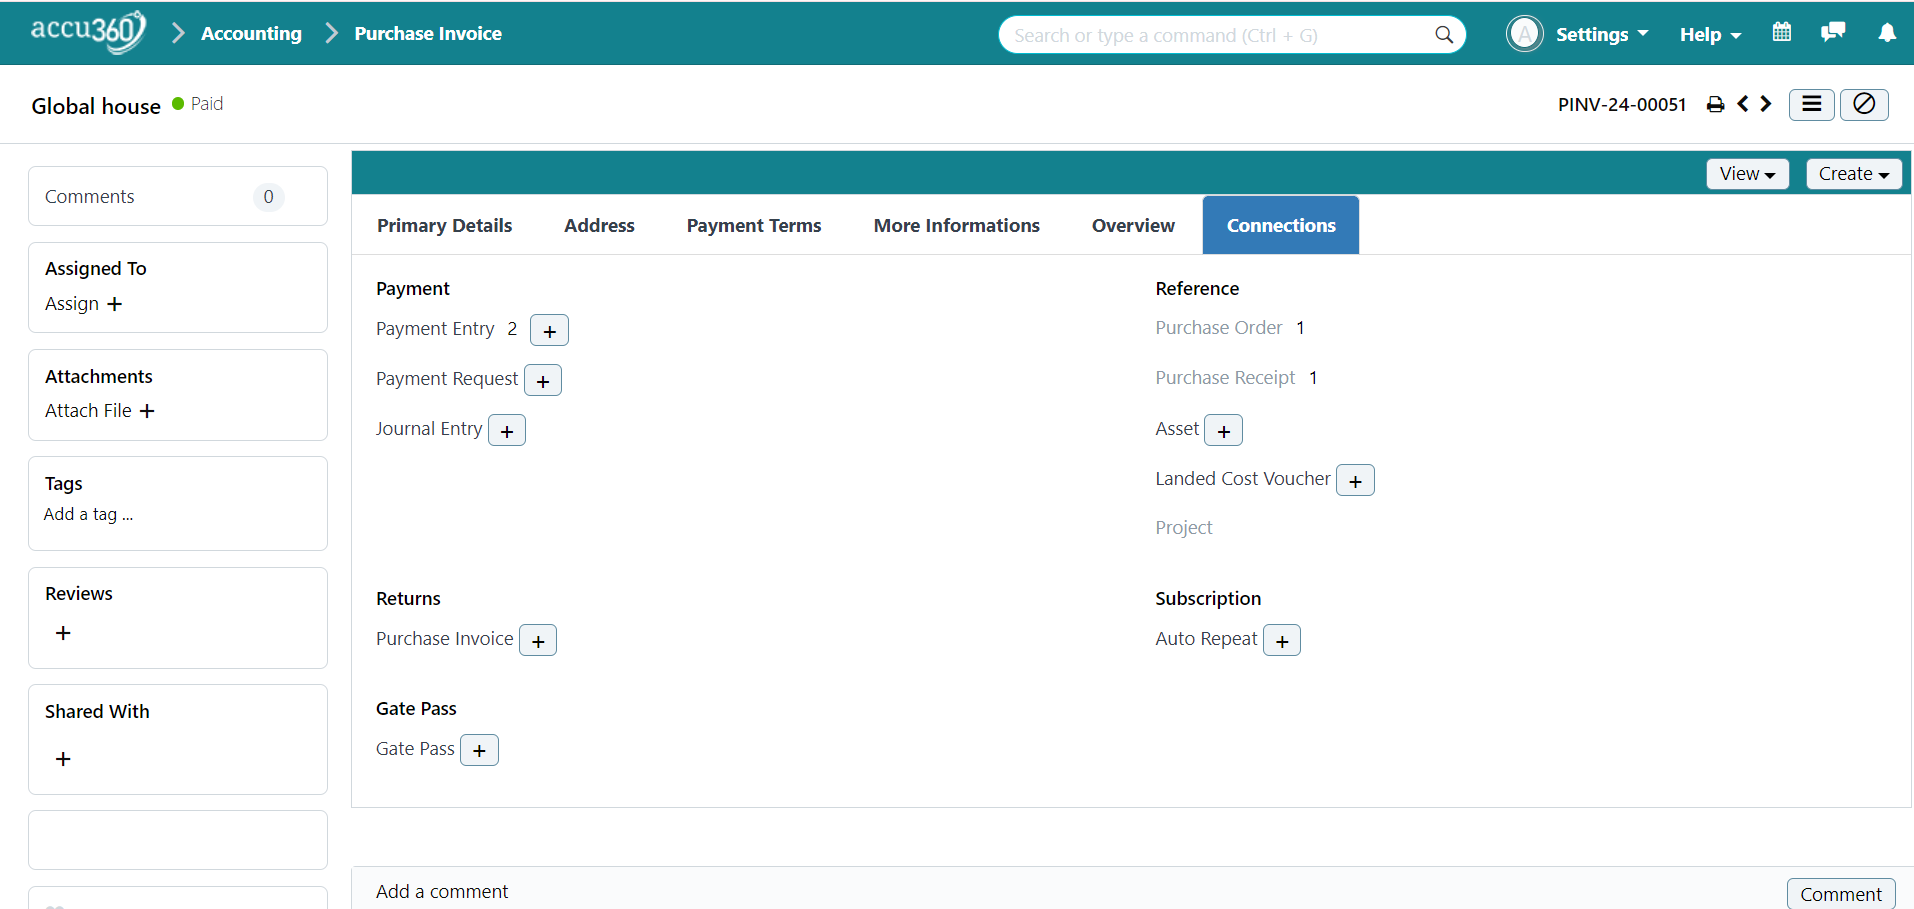
Here You can see all the available documents connected to Your Purchase Invoice
like in the above image 2 Payment Entries , 1 Purchase Order & 1 Purchase Receipt is already created in relation to this invoice.
¶ View Ledger
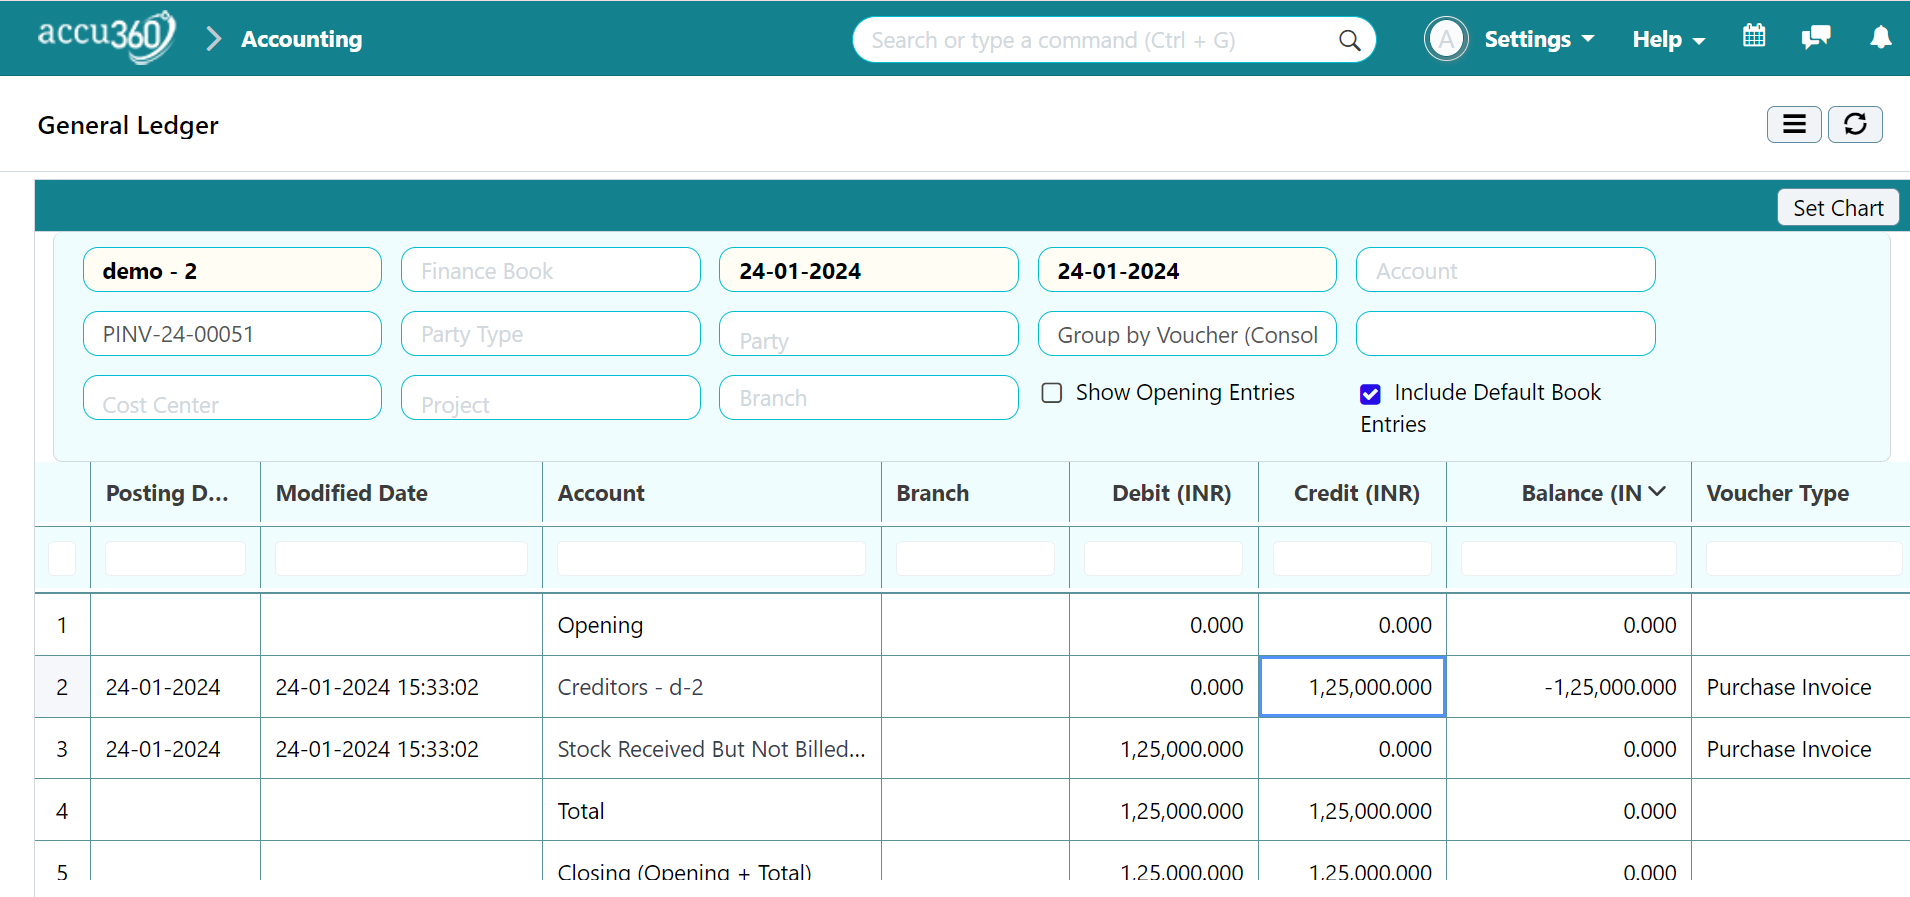
After creating a Purchase Invoice Navigate to “VIEW” & Click on Accounting ledger
to view the ledger impact of the Purchase Invoice
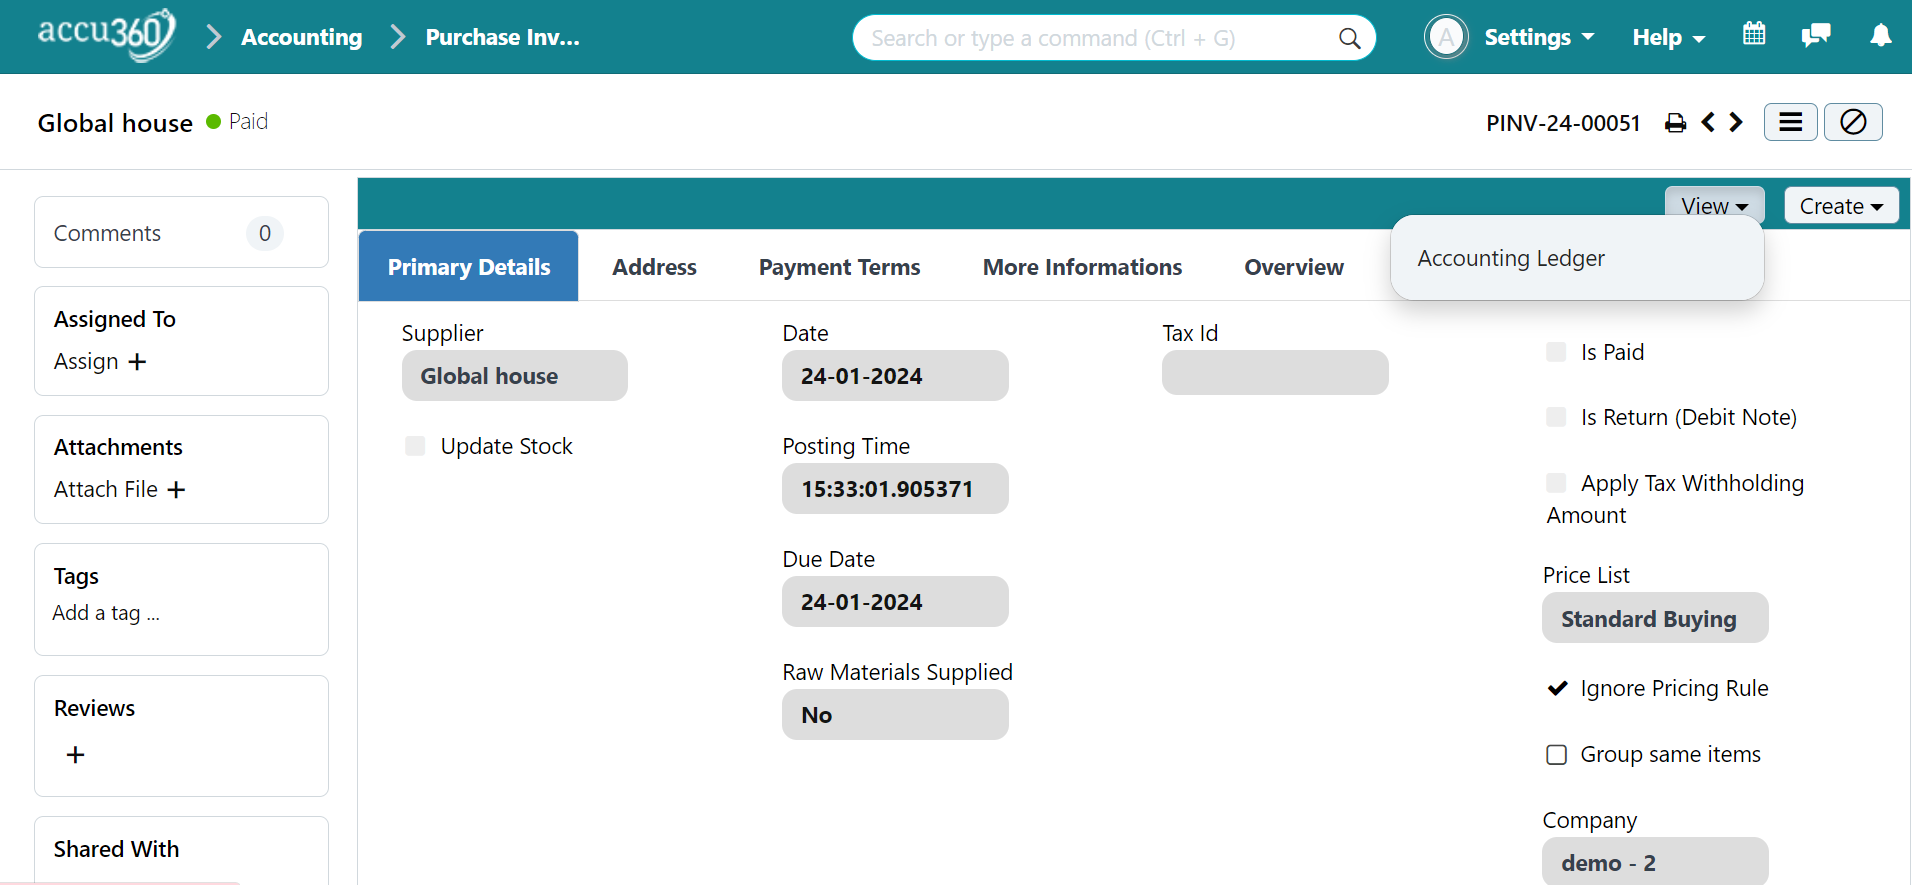
The Ledger will appear like this
